|
Over the course of the minor I've been continiously busy with improving the graphic fidelity of the simulation while still keeping a steady performance for VR. Sprint 1 was mainly a prototype set up to learn Unity to the other teammates and give an idea of what we want to create for the product owners. During sprint 1 and sprint 2 I was working on creating a more realistic atmosphere. One you would encounter inside of an airplane. The feeling I described the airplane with was "clean and matte" as a smooth seemingly plastic surface that up close is actually more rigid. 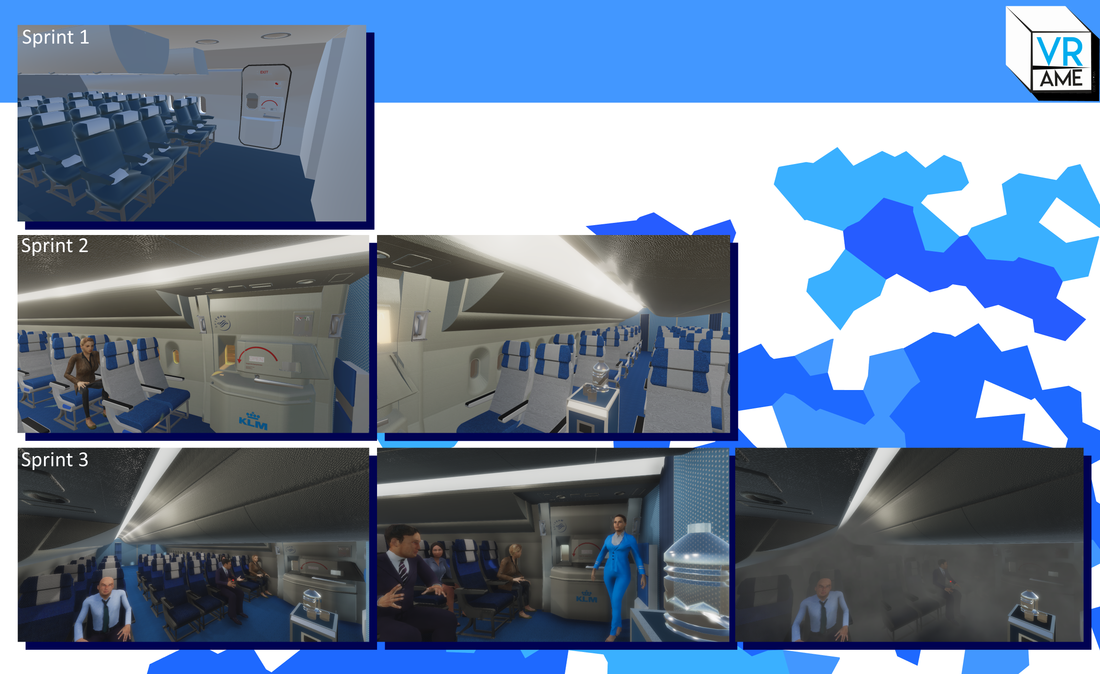 The result of sprint 2 rather encapsulates this feeling but something was still off. At that point we got somebody with extensive experience in Unity and rendering from outside the school to look at our project, Nico. In his spare time he's been busy with rendering realistic scenes in the Unity engine through use of the Physically Based Rendering (PBR) concept. PBR is a way of managing materials and lighting so that it mimics that of the real world. The idea is that one creates a room with lighting settings that come close to how lighting behaves in real life. Inside this room there are a few objects with materials assigned to them (plastic, wood, metal) that make use of the proper values. Each material has a certain value on the specular map. You keep tweaking this room until it's almost indistinguishable of the real world. This is called your reference room. Whenever you create a new model and texture you place this inside the room. If it looks like it belongs in the room you know you've done good. However, if something seems off you know it can't be the material or lighting so you'll have to make changes to either your model or the texture. 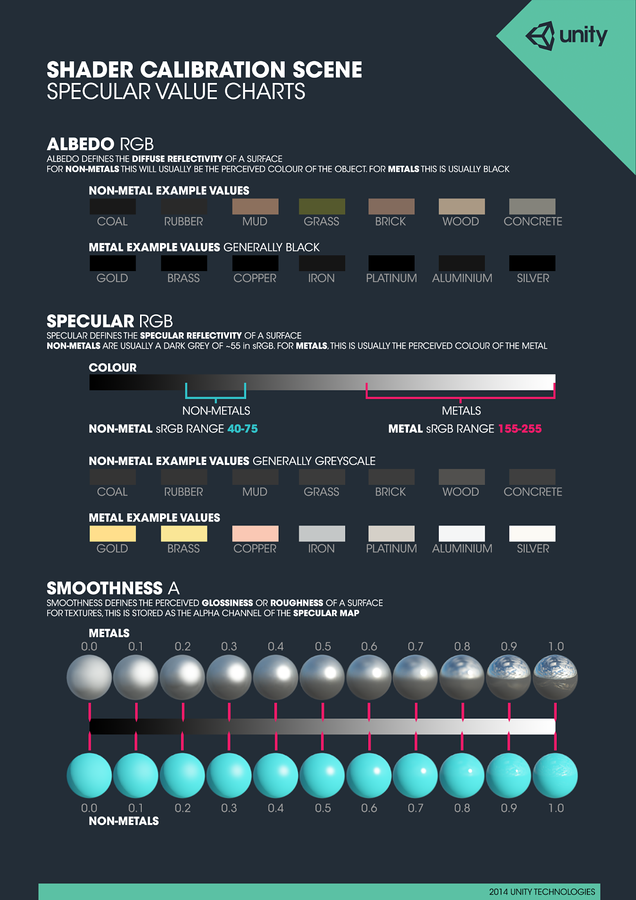 Specular shader values for PBR in Unity Nico also explained the difference between the forward en deferred rendering paths and how they impact the visuals of your game. Aswell as rendering in linear space and gamma. Both of which have better results when properly used. Especially for the lighting. We've also explored post processing effects and how you can add these to your Unity project. They used to be a standard asset, available from the editor itself. But it has moved to the Asset Store instead (link). The Post Processing Stack adds effects like Anti-Aliasing, Bloom, Ambient Occlusion, Color Grading and Color Correction. In our case ambient occlusion gave the whole scene that extra touch of realism by adding darker shades where lighting can't reach. AO is calculated from using the depth buffer and from there on out it applies a pseudo shading to those areas. 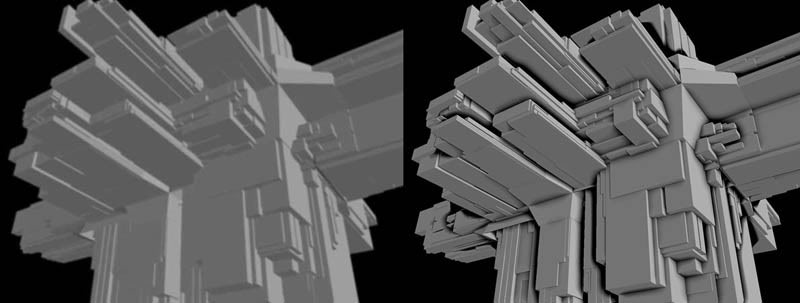 Left: No Ambient Occlusion. Right: Ambient Occlusion added To further improve performance and overal look we also asked the Game Assets class expert, Freark, for some tips. He mentioned that baking your lighting has great positive effects on your performance and depending on the lightmap even looks better than dynamic lighting. However once we started baking our lighting, black spots appeared all over the airplanes interior. For a while we just assumed it's not possible with other settings we have but after some research we discovered that this happens due to the UV-map of a model not being properly unwrapped. Faces on the UV map would overlay which, of course, would result in an overlapping lightmap aswell. Explaining the black spots. We decided to leave light baking for a later stage because unwrapping the textures for the airplane appeared to be a lot more trouble than anticipated due to the fact that it consists of a lot of individual models that have incredibly tiny faces. Overal we came to a pretty realistic seeming scene which runs at a steady 50 - 60 fps (if nothing is happening) in the VR headset. 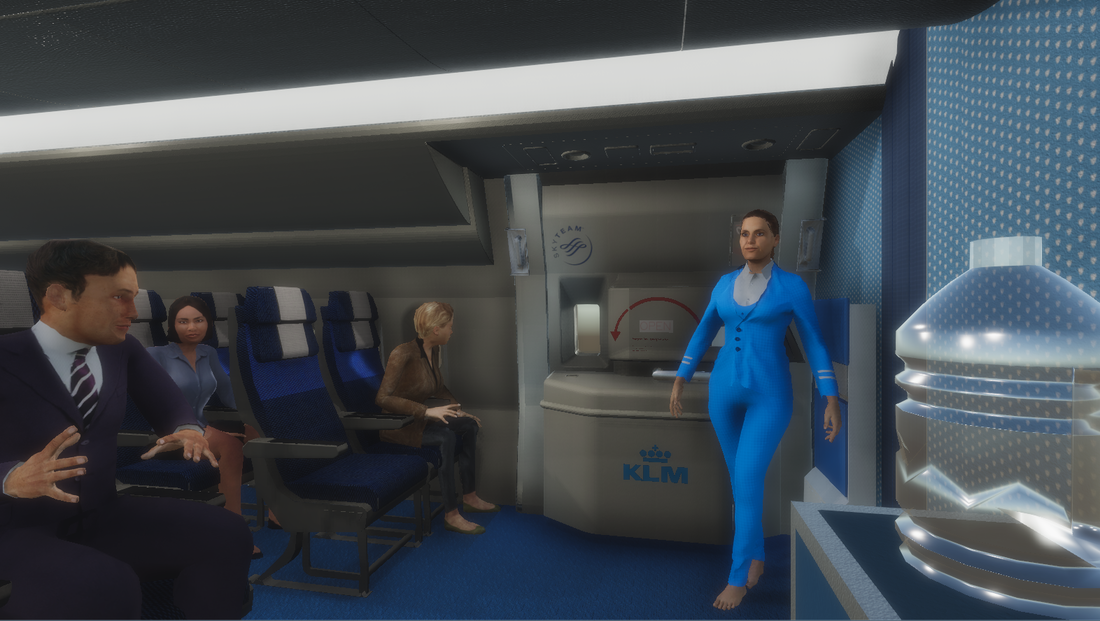 Comments are closed.
|

